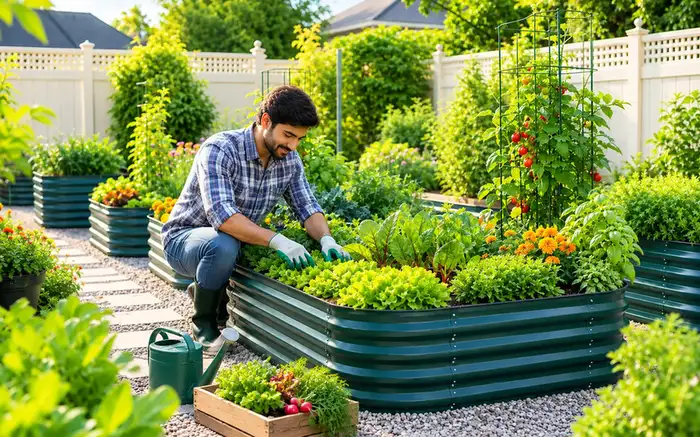
Building a raised vegetable garden doesn’t have to involve complicated construction or expensive tools. If you’ve purchased a Birdies metal raised garden bed, understanding the assembly process before opening the box can help you create a sturdy, attractive growing space with less frustration.
Learning how to assemble Birdies raised garden beds starts with choosing the right location, identifying the panels, and following the assembly diagram for your particular kit. You’ll also need to align the connections correctly, install any required braces, fit the protective top-edge trim, and check the finished structure before adding soil.
Birdies beds use a modular panel design, making assembly manageable for many home gardeners. However, the exact hardware, panel arrangement, and bracing requirements depend on the model and configuration.
In this guide, you’ll find practical Birdies raised garden bed assembly instructions, a step-by-step installation process, a tool checklist, soil-volume calculations, troubleshooting advice, and tips for avoiding common mistakes.
Whether you’re setting up your first vegetable garden or adding another growing area to your backyard, this guide will help you prepare for a successful installation.
🌿 What Is a Birdies Raised Garden Bed?
Birdies raised garden beds are modular metal structures designed to hold growing medium above the surrounding ground. Compatible panels can be assembled into different configurations, depending on the kit.
Birdies’ official product information describes coated steel construction, stainless steel fasteners, a protective rolled-edge design, and compatible configurations. Some models also use internal bracing. Always check the specifications for the exact product you’re assembling.
Why choose a metal raised garden bed?
A metal raised bed can make a vegetable garden easier to organize and maintain.
- Defined growing space: Keep vegetables, herbs, and flowers in an organized area.
- Greater soil control: Select a growing mix that suits your plants and local conditions.
- Flexible configurations: Compatible modular kits can support different layouts.
- Convenient access: A raised growing surface can make planting and harvesting more comfortable.
- Attractive garden design: Metal beds create a neat, structured appearance in backyards and patios.
Remember that a raised bed isn’t a substitute for good gardening practices. Healthy plants still need appropriate sunlight, suitable soil, adequate water, and room for their roots.
🧰 Tools and Materials Required
Before starting your Birdies raised garden bed assembly, gather the components and tools you’ll need.
Essential checklist
- Birdies raised garden bed kit
- Manufacturer’s assembly manual
- Supplied nuts, bolts, and other specified fasteners
- The appropriate tightening tool
- Protective work gloves
- Closed-toe shoes
- Tape measure
- Level
- Shovel and rake for site preparation
- Soil and suitable compost for filling the completed bed
- A helper for larger or awkward configurations
Some kits include a tightening tool, while others may require an additional household tool. Check the parts list before buying anything extra.
Safety tip: Metal panels and corners may have exposed edges before the protective trim is installed. Wear gloves while handling the components, and don’t run your hands along uncovered edges.
📍 Step 1: Choose the Right Location
The location you select affects both assembly and the long-term health of your plants. Choose the spot before constructing the frame because moving a filled raised bed is difficult.
Check sunlight exposure
Most fruiting vegetables, including tomatoes and peppers, perform best with around six to eight hours of direct sunlight per day. Some leafy greens and herbs can tolerate partial shade, depending on the variety and climate.
Before choosing your location, consider:
- How much direct sunlight reaches the area?
- Is a garden hose or irrigation system nearby?
- Will trees or buildings cast significant shade?
- Does rainwater collect in the proposed location?
- Is there enough room to walk around the bed comfortably?
Water access matters because raised beds can dry out relatively quickly in hot, sunny, or windy conditions.
Plan access around the bed
Make sure you can reach the center of the growing area without stepping into the soil. Leave space for harvesting, watering, pruning, and moving gardening supplies.
If you’re installing multiple beds, plan the pathways before assembly. A little extra room can make routine gardening much easier.
🏡 Step 2: Prepare the Ground
Birdies recommends choosing a reasonably level location, particularly for its taller beds. The preparation required depends on whether you’re installing the bed over lawn, garden soil, or paving
Installing over grass
Remove debris, stones, and unwanted vegetation that could interfere with the bed’s base.
Birdies’ FAQ describes overlapping wet newspaper or thick cardboard as an option for suppressing existing grass. Check the manufacturer’s current recommendations for your installation.
Installing over garden soil
Remove thick weeds and level the surface as appropriate. If persistent weeds are present, address them before placing the bed.
An open-bottom raised bed allows plant roots to reach suitable native soil underneath, providing additional rooting space.
Installing over concrete or paving
Birdies recommends geotextile fabric beneath the growing medium for beds installed on concrete or paving. The fabric helps retain soil while allowing water to drain.
Follow the official instructions for fabric placement and any additional surface protection.
Important: A raised bed installed on a deck or elevated structure requires special attention to the total load from the frame, wet soil, and plants. Confirm that the supporting surface can safely carry that load before installation.
📦 Step 3: Unpack the Kit and Check Every Part
Open the package carefully and place the components on a clean surface.
Compare the contents with the parts list in your manual. Depending on the kit, the components may include:
- Side and corner panels
- Nuts and bolts
- Internal braces
- Protective top-edge trim
- Assembly tools or other supplied hardware
Inspect the panels for visible damage, and check that all required fasteners are present.
If anything is missing or damaged, contact the seller or manufacturer before continuing. Don’t substitute random hardware for a structural fastener.
If your panels have protective film, remove it according to the manufacturer’s instructions. Organize the small parts in a container to prevent them from getting lost.
📐 Step 4: Select and Arrange Your Bed Configuration
Some Birdies Original modular kits support several compatible configurations. The available layouts depend on your specific kit.
Before fastening anything, study the assembly diagram and arrange the panels on the ground in the intended order.
Check the shape, orientation, and dimensions against the manual.
Consider the space available, the crops you plan to grow, and whether you can comfortably reach all areas of the bed.
Beginner tip: Dry-fitting the panels before tightening them can help you identify orientation errors early.
🔩 Step 5: Connect the Metal Panels
This is the main stage of learning how to assemble Birdies raised garden beds.
Follow the panel sequence and fastening instructions supplied with your particular model. The exact connection points and hardware arrangement can differ between configurations.
Follow these assembly steps
- Position the first panels. Arrange them according to the manufacturer’s diagram.
- Align the holes. Check that the intended connection points line up naturally.
- Insert the specified bolts. Use the supplied hardware at the designated points.
- Attach the nuts. Start the connections carefully without forcing the fasteners.
- Continue around the frame. Join the remaining panels in the sequence shown in the manual.
- Check the shape. Confirm that the structure matches your selected configuration.
Where the manufacturer’s instructions permit it, leave the connections slightly loose during initial assembly so you can make small alignment adjustments before final tightening.
Why panel alignment matters
If one panel is reversed or incorrectly positioned, the remaining holes may not line up. Trying to force the components together can damage the panels or fasteners.
If a bolt won’t fit, stop and recheck the orientation. Never bend a panel or force a fastener through misaligned holes to make the frame fit.
🛠️ Step 6: Install Any Required Internal Braces
Some Birdies configurations include internal bracing as part of their structural design.
If your kit includes braces, install them at the locations shown in the manual. Check their orientation and confirm that all specified fasteners are fitted.
Bracing matters because the weight of the growing medium creates outward pressure against the bed’s sides.
Don’t omit a supplied brace simply because the empty frame appears stable. Equally, don’t improvise structural modifications without appropriate manufacturer guidance.
Once the required braces are in place, review the frame before completing the final tightening.
🔧 Step 7: Tighten the Fasteners Correctly
After connecting the panels and installing the required braces, tighten the fasteners according to the manufacturer’s instructions.
Use the specified tool and tightening method. Avoid overtightening, which may damage the threads, hardware, or panel connections.
Check that:
- The panels are aligned correctly.
- All required fasteners are installed.
- The braces are in their intended positions.
- The frame matches the selected configuration.
- No connection appears loose or damaged.
If the frame appears twisted or doesn’t sit securely on the prepared surface, identify and correct the cause before adding soil.
🛡️ Step 8: Install the Protective Top-Edge Trim
The protective edge trim is an important finishing component. Birdies describes its beds as having a rolled steel edge with a clip-on safety strip.
Fit the supplied trim according to your model’s instructions.
Work around the perimeter and check that the trim is seated securely. Pay particular attention to corners and joints where sections meet.
Don’t skip the safety trim. It helps cover exposed metal edges and reduces the risk of cuts during routine gardening.
If the trim won’t fit properly, check its orientation and the manufacturer’s fitting instructions rather than forcing it into place.
✅ Step 9: Inspect the Completed Frame
Before adding soil to your Birdies raised garden bed, take a few minutes to inspect the entire frame. A careful final check helps ensure the bed is stable, properly assembled, and ready for planting.
1. Check the Panel Connections
Inspect every corner and panel joint to make sure the panels are connected correctly. Confirm that all bolts, nuts, and other supplied fasteners are installed according to the instructions for your specific Birdies model.
2. Make Sure the Frame Is Stable
Gently check the frame for excessive movement or loose connections. The bed should sit securely on the prepared ground without noticeable rocking. If it moves, check the ground level and tighten the relevant fasteners as directed in the assembly manual.
3. Inspect the Protective Edging
Check that the supplied safety edging or protective trim is fitted securely along the exposed upper edges, wherever required by your model. Look for gaps, loose sections, or exposed sharp edges, and correct them before using the bed.
4. Check the Internal Braces
If your Birdies raised garden bed includes internal support braces, make sure each brace is installed in the correct position and securely fastened. These supports help maintain the bed’s shape under the pressure of the soil.
5. Confirm the Bed Is Properly Positioned
Stand back and inspect the completed frame from all sides. Make sure it is positioned where you want it, sits as level as practical, and has enough surrounding space for watering, planting, harvesting, and routine maintenance.
6. Complete a Final Safety Check
Remove leftover packaging, tools, and loose hardware from inside and around the bed. Check for damaged panels, protruding fasteners, or sharp edges. If any component appears damaged or does not fit correctly, consult the manufacturer’s instructions before proceeding.
Final tip: Do not fill the bed until you are satisfied that the frame is assembled correctly and securely positioned. Once the inspection is complete, you can move on to the next step: filling your Birdies raised garden bed with the appropriate soil or growing mix for your garden.
🌱 Step 10: Prepare and Fill the Raised Garden Bed
Once the frame is assembled, decide how to fill it based on its height, location, and intended crops.
Choose a suitable growing medium
For many home vegetable gardens, a quality raised-bed mix or an appropriate blend of topsoil and finished compost is a sensible starting point.
A good growing medium should provide:
- Adequate drainage
- Moisture retention
- Organic matter
- A loose structure that supports root growth
- Nutrients appropriate to your plants
Avoid filling the bed entirely with compost. Compost is useful as a soil amendment, but excessive amounts can cause nutrient or salt imbalances.
How much soil do you need?
For a rectangular bed, use this formula:
Length × width × soil depth = cubic feet
For example, a bed with internal dimensions of 6 feet long, 2 feet wide, and 1.25 feet high has a geometric volume of:
6 × 2 × 1.25 = 15 cubic feet
This is an illustrative calculation, not a measurement for every Birdies bed.
Birdies’ soil calculator uses the selected model and configuration to estimate the required volume. For its 15-inch beds, the calculator uses the full bed depth. For its 29-inch beds, the recommended filling option uses approximately 15 inches of soil over suitable organic material, with a separate option for filling the entire bed with soil.
Fill the bed carefully
Add the growing medium gradually and distribute it evenly.
If you’re using a layered filling method for a taller bed, follow Birdies’ recommendations and use clean, suitable organic materials beneath the growing layer.
Avoid contaminated materials, treated timber, and unknown waste. Check the sides as you fill, and never climb into the bed to spread the soil.
Water the growing medium appropriately and allow for settling. Top up the bed when necessary.
🌼 Step 11: Prepare for Planting
With the assembly complete, you’re ready to plan your garden.
Choose crops based on sunlight, local frost dates, available space, and the season. The USDA Plant Hardiness Zone Map is useful for choosing perennial plants, but local frost dates and regional planting calendars are more appropriate for scheduling annual vegetables.
A few helpful tips:
- Install drip irrigation before plants become large if you plan to use it.
- Follow seed-packet instructions for plant spacing.
- Keep taller plants from unnecessarily shading smaller crops.
- Monitor soil moisture during hot and windy weather.
- Add suitable mulch to help conserve moisture.
- Avoid overcrowding seedlings.
Raised beds may warm up earlier in spring, but they can also dry out faster in summer. Check the growing medium regularly and adjust watering to the weather.
⏱️ How Long Does Birdies Garden Bed Assembly Take?
The time required depends on the kit’s size, panel arrangement, number of braces, your DIY experience, and whether you have help.
A straightforward configuration generally involves fewer components than a larger bed with additional structural parts.
Allow time for unpacking, site preparation, panel assembly, fastening, edge trim installation, and a final inspection. Filling the bed can add substantial time, especially if you’re moving soil by hand.
Rather than relying on an unverified universal assembly-time estimate, plan the work so you can complete each stage carefully without rushing.
📊 Birdies Raised Bed Installation: Quick Comparison
| Stage | Main purpose | What to check |
|---|---|---|
| Site preparation | Create a stable base | Levelness and drainage |
| Panel assembly | Build the intended shape | Orientation and connections |
| Bracing | Support the structure | Required components fitted |
| Fastening | Secure the panels | Correct tightening |
| Edge trim | Cover exposed edges | Secure fit around the perimeter |
| Filling | Prepare the growing environment | Soil volume and drainage |
| Planting | Establish healthy crops | Sunlight, spacing, and watering |
⚠️ Common Birdies Garden Bed Mistakes to Avoid
Avoid these common mistakes when assembling and preparing your Birdies raised garden bed to ensure a safe, stable, and productive growing space.
- 🧱 Choosing Uneven Ground: Place your garden bed on firm, reasonably level ground. An uneven base can cause instability, especially with taller beds.
- 🔩 Leaving Fasteners Loose: Check all bolts, panel connections, and supplied braces. Follow your model’s assembly instructions and avoid overtightening hardware.
- 🛡️ Ignoring Safety Edges: Install the supplied protective edging correctly wherever required. Check for exposed sharp edges before handling or filling the bed.
- 📏 Guessing the Soil Quantity: Calculate the bed’s volume before purchasing soil. Buying too little delays planting, while buying too much wastes money.
- 🌱 Using Poor-Quality Soil: Choose a suitable, high-quality growing mix that supports drainage, moisture retention, and healthy root development.
- 💧 Forgetting Drainage: Birdies beds generally have an open bottom. Avoid placing them where water collects, and prepare the base appropriately for your surface.
- ☀️ Ignoring Sunlight: Choose a location that suits your plants’ sunlight requirements before assembling the frame.
✅ Pro tip: Always inspect the completed frame before adding soil or planting.
🧩 Troubleshooting Common Assembly Problems
Even when following the instructions, you may encounter a few challenges while learning how to assemble Birdies raised garden beds. Here are practical solutions to common issues.
🔩 1. Panels Do Not Align
Check that the panels are positioned in the correct order and orientation. Loosen the fasteners slightly, realign the panels, and retighten them according to the manufacturer’s instructions.
🛠️ 2. Bolts or Nuts Are Difficult to Fit
Avoid forcing the hardware. Check the alignment of the holes and confirm that you are using the supplied fasteners correctly. If a component appears damaged, contact the manufacturer.
📐 3. The Garden Bed Wobbles
Inspect the ground beneath the frame. Remove high spots or fill low areas to create a stable, reasonably level base before tightening the connections.
🛡️ 4. Safety Edging Will Not Stay in Place
Check that the protective trim is fitted correctly along the intended edges. Follow the model-specific instructions rather than forcing it into position.
🌱 5. The Frame Looks Uneven After Assembly
Recheck the panel connections and ground level before adding soil. Correcting alignment now is easier than adjusting a filled bed later.
🌻 Final Thoughts
Learning how to assemble Birdies raised garden beds becomes much easier when you prepare the location, identify the components, follow the correct assembly sequence, and inspect the finished frame before adding soil.
Pay particular attention to panel alignment, required braces, correct fastening, and protective edge trim. Once the bed is ready, choose a suitable growing medium and plan your planting around local sunlight, climate, and watering needs.
A carefully assembled raised bed gives you a practical foundation for growing vegetables, herbs, and flowers at home.
For more practical gardening ideas, explore Sprout & Haven and discover ways to make your outdoor space more productive, beautiful, and enjoyable.
❓ Frequently Asked Questions
Q1. How long does it take to assemble Birdies raised garden beds?
Ans- Assembly time depends on the bed size, configuration, and your experience. Allow additional time for preparing the ground, checking the components, and fitting the protective edging. Having a helper can make handling larger panels easier.
Q2. Can one person assemble a Birdies raised garden bed?
Ans- Some smaller kits may be manageable alone, but a helper can make panel alignment and positioning easier. Follow the lifting and handling guidance supplied with your model, especially for larger configurations.
Q3. Do Birdies raised garden beds need a foundation?
Ans- A special foundation is not normally required when the bed is placed on suitable, firm garden ground. The surface should be reasonably level and allow appropriate drainage. Decks and balconies require separate checks for load capacity and water management.
Q4. Do Birdies raised garden beds have a bottom?
Ans- Birdies raised garden beds are generally open at the bottom. This allows drainage into suitable underlying soil and may allow roots to grow beyond the bed. The best preparation depends on whether you’re installing over lawn, garden soil, concrete, or paving.
Q5. How much soil do I need for a Birdies raised garden bed?
Ans- Soil requirements depend on the internal dimensions and the depth you plan to fill. Calculate length × width × depth using feet, then check Birdies’ soil calculator for your particular model. Some taller beds may accommodate a recommended layered filling method.
Q6. Should I put cardboard under a Birdies raised garden bed?
Ans- Cardboard can be used by some gardeners to suppress grass and weeds when installing over lawn, but it is not essential for every situation. Consider the existing vegetation, drainage, and the manufacturer’s guidance before choosing a base preparation method.
Q7. Can I put a Birdies raised garden bed on concrete?
Ans- It may be possible, but drainage needs careful consideration because water cannot flow into the ground below. Follow the manufacturer’s advice for paved surfaces and suitable fabric or liner arrangements. Also check that the surface can support the weight of the filled bed.
Q8. Why are the bolts on my Birdies raised garden bed not lining up?
Ans- The panel orientation or frame alignment may be incorrect. Recheck the assembly diagram and loosen nearby connections if the instructions permit, then realign the panels. Do not force the bolts or substitute different hardware without manufacturer guidance.
Q9. Do I need reinforcement for a Birdies raised garden bed?
Ans- Install all braces and reinforcement components specified for your particular model. Requirements can vary by configuration, so consult the supplied manual rather than assuming that reinforcement is optional.
Q10. Can I grow vegetables in Birdies metal raised beds?
Ans- Yes. You can grow many vegetables, herbs, and flowers in a metal raised bed. Choose a suitable growing medium, provide the sunlight your crops need, and follow planting advice for your local climate and growing season.
Q11. What should I do if my raised bed starts bowing?
Ans- Stop adding soil and keep people away from the affected area. Do not continue filling the bed or attempt an improvised repair while it is under pressure. Contact the manufacturer for guidance specific to your model before using it.
Q12. Can Birdies raised garden beds be reconfigured?
Ans- Some modular kits offer compatible alternative configurations. The available options depend on the particular kit and its components. Check the manufacturer’s instructions before dismantling or rearranging the bed.